There are many electronic boards out there, why use the Arduino board? Well, there are many reasons that make this microcontroller special. Advantages of using the Arduino includes:
Arduino simplifies microcontrollers for beginners
Besides the main microcontroller chip, a microcontroller will require many different parts for it to work. What Arduino did is that they took all the essential components of a microcontroller and design it in a way that is very simple to operate of a piece of PCB. This makes the Arduino boards welcoming to all beginners!
Furthermore, with Arduino easy to use IDE software for beginners, the Arduino are easier to learn to program as it uses a simplified version of C++ compared to other programming software. Because of this, the Arduino is commonly cited as the pathway for everyone who is looking to learn about microcontrollers. With it being optimised for users of all levels, even advanced users are taking advantage of the Arduino IDE as well!
In addition, the Arduino community is very big and many users and organizations are all using it. There are wide varieties of tutorials and projects available online that are pre-coded for you to learn and build using the Arduino allowing beginners to get started very easily.
Cheap
Whenever you are buying something, you will always look at the cost first. The Arduino are very accessible and cost-effective!
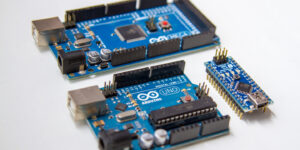
You can get an official complete Arduino UNO Rev3 or our very own arduino uno which is an Arduino-compatible board, that is based on ATmga328P MCU (same as Arduino UNO) !
Without breaking your wallet, you can easily get an Arduino for yourself to play with!
Cross-Platform
Arduino IDE is also cross-platform which means you can run it on Windows, Macintosh OSX and also Linux operating systems compared to other microcontroller systems which can only run Windows.
Wide Variety
The Arduino has many variations for you to choose from to allow you to pick one that suits your project the most!
Having space constraints? You can get yourself an Arduino Nano that is only 43.18 mm by 18.54 mm! Require more memory space and processing power? You can get yourself an Arduino Mega!
We will talk more about all the different types of Arduino’s and their differences later on!
What makes up an Arduino Board?
The physical hardware of Arduino is the board itself. However, when it comes to Arduino boards, there many varieties with different functionalities.
Today we will be looking at arduino UNO . Most Arduino boards will have these various common components that we are going to list:

1 – USB Input
- USB Port is used to connect the board to your PC for programming and for powering up the Arduino board.
- This USB connection is important as it will be through this port where you will upload your code onto your Arduino board..
2 – DC Input
- The DC power jack allows your Arduino board to be powered from a wall adapter so that you can supply more power to your project if needed.
3 – 3.3V and 5V Pins
- As the name specifies, the 3.3V and 5V pins supply volts of power to your modules. The 3.3V pin supplies 3.3 volts of power while the 5V pin supplies 5 volts of power.
4 – GND pins
- With this GND (Ground) pin, they are used to ground your circuit.
- GND means this pin is at zero voltage with respect to the power supply and ground plane of the circuit board
5 – Analog Pins
- The analog pins allows the Arduino to read signals from an analog sensor like a light sensor and convert it into a digital value.
- Even though the main function of the analog pins for most Arduino users is to read analog sensors, the analog pins also have all the functionality of general-purpose input/output (GPIO) pins.
6 – Digital Pins
- On the Arduino UNO, the digital pins are on pin 0 to 13.
- They allow the Arduino to read digital inputs like a button being pushed and digital output like turning on an LED.
7 – Reset button
- This reset button allows you to reset the board and restart any code uploaded on your Arduino board. Once pressed, the reset pin will be temporarily connected to the ground.
- This reset button is very useful for your projects in the event your code does not repeat itself but you wish to test it multiple times.
8 – RX/TX Indicator
- Also known as Transmit and receive indicator, the TX and RX LED indicators are connected to TX and RX of the USB-to-UART chip.
- They work automatically and lets you know when the board is sending or receiving data respectively like when you are uploading a program onto your Arduino board.
9 – Microcontroller
- Arduino UNO is based on the microcontroller: ATmega328P
- This is the primary chip which acts as the brain of your Arduino board.
- They allow you to program your Arduino in order for it to be able to execute commands and decisions based on the code.
- You will have to know which type of microcontroller your board is using before loading a new program from the Arduino Software.
- Even though the microcontroller on the Arduino boards is different, their difference is not big. The only difference that you may notice is the different amounts of onboard memory.
With your Arduino board, you definitely can’t do anything much with it. This is where Arduino sensors and shields :